A Year In the Garden is a series of articles on gardening for beginners which covers gardening and landscaping over the course of a year.
March is like a light at the end of a long tunnel here in Zone 5. Gardeners are ready to get back in the garden but it’s still not warm enough. The temperatures in zone 5 can range from below zero to 6o degrees during this month. Even though we can’t plant outside, there are still a lot of other jobs to do. Now is a good time to start more plants from seed indoors, sharpen tools, test the soil, prune fruit trees, build raised beds and clean up the garden.
Checklist:
- Start Seeds
- Test the soil
- prune fruit trees
- clean up the garden
- build raised beds
- sharpen tools
For now, here’s whats going on around the property:
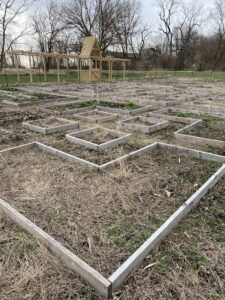
The garden in March
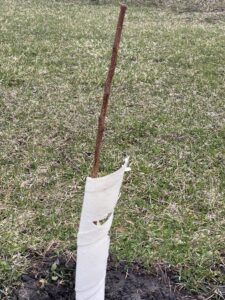
Newly planted apricot tree.
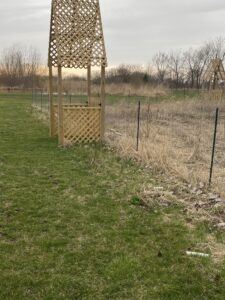
Roses on South side of the garden
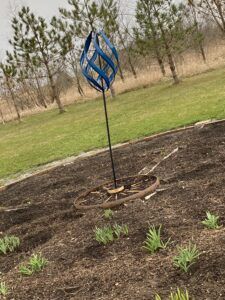
Medicine Wheel in March after chicken party.
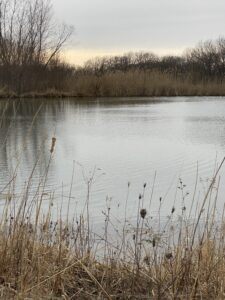
Pond in March
Early March
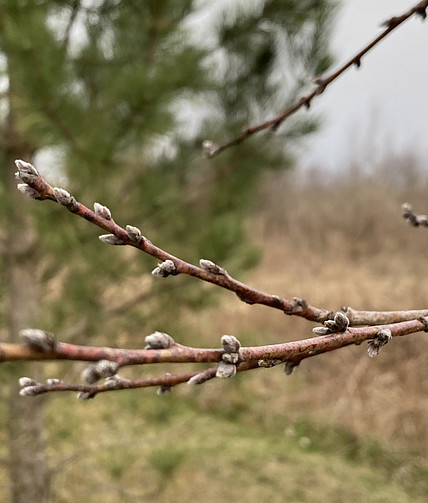
Now is the tIme to prune the fruit trees if you haven’t gotten to it already. You can prune them in February but it’s always too cold so I usually wait until early March. You want to start your fruit trees out right for the best fruit so pruning is very important. There are a lot of videos available to watch now so it makes pruning much easier. I used to have to read about it in a book and then try to figure out what they were talking about. Now you can easily understand by watching a couple of pruning videos.
Prune Broken Branches
But for the sake of anyone who wants to know the gist of pruning I will give you a few tips here. First, prune any damaged, broken or diseased looking branches. That’s the easiest part to prune because they are so easy to identify and prune off. Have a cloth sprayed with some kind of bleach or disinfectant to wipe off your pruning shears if there is any disease present. It’s good practice to always wipe off your pruning shears but if I am only making a few clean cuts I don’t bother.
Prune Crossed Branches
The second easy pruning cut is with any crossed branches. Choose the best one to keep and then cut off the other one. When two branches cross each other they end up damaging both branches so it’s best to choose one and prune the other.
Prune Inside Facing Branches
Next, you want to look for any branches that are growing towards the inside of the tree. You want light to get to the inside of your tree so the fruit can fully develop so you need to remove these branches. You can prune them back to an outside facing bud or remove the branch entirely. This sounds like it should be an easy pruning cut but I often have a hard time deciding it I want to cut this branch or not. This is where the videos come in handy so you can see examples of when it’s better to remove the branch rather than leaving it grow.
Form the Shape of The Tree
The final and hardest cuts to make (for me anyways) are the ones to form the basic structure of your tree. This is complicated and the best way to learn is by watching a couple of good videos.
Plastic Cylinder Trunk Covers
I cover my tree trunks with plastic cylinders because the rabbits eat the bark off the trunks of the young fruit trees. I also have the deer eating off the tops of the young trees so it’s a double whammy for these little fruit trees. You need to pull off the cylinders periodically and check the trunk. I usually take a look at the trunk when I prune and then replace the cylinder.
Mid March
The last frost date in Zone 5 is May 15th. This means that I can safely plant vegetable crops outside on and after this date without risk of a frost killing everything. Of course, there can always be a freak occurrence but usually this is a safe time to plant outside.
The problem with this late frost date is that a lot of the plants I want to grow take up to 120 days to mature their vegetable or fruit. If I plant a pepper seed outdoors on May 15th and I have to wait 120 days for a pepper, I won’t have a pepper until August 15th or later. Then, I only have about a 30 to 40 day window to get peppers because now I’ll be expecting the first fall frost which will kill the plant and rot any peppers.
Start Seeds Indoors
There are several ways to extend the planting season in both directions, spring and fall. In the spring, the first way to get earlier peppers is to start your pepper seeds indoors 8 to 12 weeks before the last frost. If May 15th is my last frost, I can plant my pepper seeds indoors around mid March.
I also start all of my medicinal herbs, annual herbs, perennial and annual flowers, tomatoes and sweet potatoes around mid March. If the weather is dry enough or mild enough, I will be able to get some of these plants into the garden early by using a grow tunnel or with another form of protection.
Use Seed Trays and Covers
I use seed starting trays with plastic covers. They only cost about $1 each and they hold about 25 -40 cups depending on the size of the cup you use. I don’t use the tray inserts anymore because they are too expensive. I use 3-6 ounce paper or styrofoam cups filled with a dirt mixture that I mix myself. You can see my detailed seed starting directions here.
Write Name of Plant on Cups
I mark the name of the plant on the outside of the cup with a permanent marker. I used to use popsicle sticks but the kids were also moving the sticks around and I never knew exactly what plant I was planting so I started writing on the cups instead.
Dirt Mixture
The mixture of dirt I use is 3 parts top soil, 1 part peat moss, 1/2 part vermiculite, and 1/2 part perlite. Sometimes I run out of either the vermiculite or the pearlite and then I just use what I have on hand. My seeds usually sprout so I think you can be flexible and use what you have. The top soil alone is way too heavy for a lot of the tiny seeds though so it’s better to mix it with some of the others.
Make Drainage Holes
Poke holes in the bottom of the cups for drainage and fill with your dirt mixture. Place the cups in the plant tray and water. Then place your seeds in each cup, several to a cup and mark the name of the seed with permanent marker on the side of the cup. Top off with a little dirt or peat moss, tamp down lightly and water again. Don’t cover any seeds that need light to germinate. This requirement should be stated on the seed packet and it is usually the teeny tiny herb seeds that require light.
Cover and Wait
Finally, place the plastic cover over the cups in the tray and put the tray on your grow shelf or in front of a window that gets light. I have some plants on shelves with grow lights and I have others on shelves in front of a window. I’ll compare the results and share the pictures in April and May.
You should not have to water again until your seeds sprout and you take the cover off. As soon as the majority of cups have some seeds sprouting you can take the cover off. Once the cover is off, you will need to check them every day regarding watering. The amount of watering depends on the amount of light, the type of plant, and the stage of growth. I check all my seed trays every day and water as needed. You have to be really careful with the small delicate seedlings. Watering directly can knock them down and they end up dying.
Damping Off
Another thing to watch for is something called damping off. You can read more about this disease here. It is a fungal disease and it looks like bits of cotton fluff. If you catch it early you might be able to pull it off and the plant will still be ok but usually it kills the plant.
Damping off can be caused by dirty materials. I always make a new mixture of dirt for seed starting and use new cups so I don’t have this problem anymore. I reuse my trays and covers but I don’t plant directly in the tray since I use the cups and it never seems to be a problem. I did see it more when I reused the plastic inserts. People say to wash everything with a bleach mixture and it won’t happen but I just buy new cups because it’s cheap and works great.
Plant Sweet Potatoes
Sweet potato seeds are expensive! Another alternative is to start some plants now using sweet potatoes from the grocery store.
Cut the sweet potato in half lengthwise. Place it in a seed flat filled with your dirt mixture. Place it cut side touching the dirt and tamp in firmly. Water well. Cover the seed flat with a plastic cover. Small little leaves should begin to form within a couple of weeks. Take off the cover and place the tray in a sunny window until it’s time to plant outside.
Late March
Now that your fruit trees are pruned and you have a good head start to the seed starting, it’s time to do more clean up in the garden. I usually wait for a nice day to do this job. It’s always best to clean up the garden in the fall but sometimes I just don’t get to all of it. Now is the time to get back in the garden and remove any old plants from last season. I also pull any weeds that might have started growing already and spread some of the aged chicken manure compost I have ready.
This is also a good time to check your tools. Sharpen them as needed, especially the hoe. Sharpen the hoe so the angle of the hoe itself is facing upwards towards the inside of the pole. This angle makes the work more efficient with less effort. A correct hoe angle and sharpness also puts less stress on the roots of the plants you are weeding around.
Blades for lawn mowers and tillers should be sharpened now as well. You can do this yourself if you know how or take them off and take them to a dealer that will sharpen them. A flea market by me always has someone who is sharpening blades.
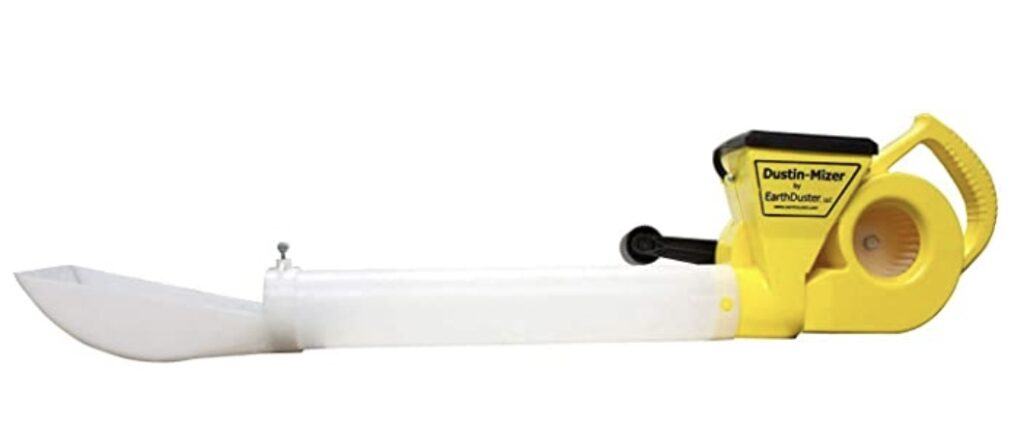
Pest Control
Be on the look out for a trombone duster and a small 1-2 gallon sprayer. These can be used for organic pest control in the summer. I only use organic pest control methods but you can decide that for yourself. Either way you will want to have these two items as part of your equipment.
Best Practice
The following tips are always best practice in the garden whether you grow organically or not:
- Hand pick any of the bigger bugs like beetles. You can pick them off the plant and put in a cup of soapy water.
- Choose insect and disease resistant plant varieties.
- Keep the garden weeded and tidy.
- Always rotate your crops. Growing the same plant in the same location depletes the nutrients in the soil which makes for a weaker plant that is more susceptible to bugs or disease and grows bigger bug populations in that area.
- Grow at different grow dates. Earlier crops are farther along in the growth cycle when the usual bug comes a calling. This prevents excess damage to your crops.
- Clean up dead plant matter. Don’t leave decaying matter around for bugs to breed and disease to grow.
Rabbit Proof
One of my best tips for rabbits and similar visitors is rose clippings. I put them around all my spring plants and I never have a rabbit problem. The trick is that the clippings must go around all the newly planted plants in the spring garden. It’s easy to do and I just save all the rose clippings when I prune the roses early in the month. I do get stuck by thorns a few times but it ends up being worth it.
Soil Test
Now is a good time to complete the soil test you bought last month. Take samples from several different sections of you garden bed area. Go down at least 6 inches and take a trowel full and place it in a bucket. Go to your next section and repeat the process.
Take samples throughout your garden.
Mix up the samples in your bucket and you are ready to complete the test.
Follow the directions in your test kit for completing your test. The test will give your results and suggestions for improving your soil. Remember, limestone brings up the ph of the soil and sulphur brings it down. You are less likely to have alkaline soil so don’t spread sulphur unless you are positive your soil is too alkaline.
You might also find that one of the three elements nitrogen, phosphorus or potassium is low. You can spread the 5-10-10 or 10-10-10 fertilizer over the garden bed before you till it or spread compost over the area before you use the tiller.
You can also send a soil sample to your county extension service to test your soil for a fee or you can find some other experienced gardeners in your immediate area. They always know what you need to add in your area!
The other key information to remember is to never use limestone in areas where you are growing potatoes. Potatoes like an acidic soil and limestone in the area might encourage scab, a blight you don’t want!
Dig Raised Beds
While you are out i the garden, you might want to prepare a couple of your raised beds if your soil is not too wet. You can use these beds for trying some early crops next month.
These are raised beds made by raking the soil from the pathways on either side of the bed onto the bed. These raised beds last for one season. You need to rebuild them every year. That’s another reason why I like the permanent raised beds built with wood or rocks.
Don’t try to build these if the soil is too wet because you will end up compacting your soil which you don’t want to do. How do you know if your soil is too wet? Some people take a handful of dirt and make a ball. Then poke the ball. If the soil sticks together it’s too wet. If you poke it and it crumbles, it’s ok to dig. Dick also shows a picture of two footprints in the dirt. One is shiny so the soil is too wet. One is dull so the soil is ok to dig. Both ways help you to decide.
If your soil is dry enough, clean the area of weeds. Dig up or till the area to loosen the soil about eight inches deep. Mark a 24 inch wide row using stakes and string. I sometimes skip the stake and string if I’m in a hurry. Use the metal rake to pull the soil from the pathway area up and onto the raised bed area. Go down the whole row pulling the soil up and onto the bed.
Then go to the other side of the bed to the other pathway area. Pull this dirt up and onto the raised bed. Your bed should look like a mound with lower areas of pathways surrounding it. It always reminded me of burial grounds in old movies.
Now flatten the top of your mound with the back end of the rake. Drag the back end of the rake over the middle section of your raised bed. You should have a flat area for planting. If you did not fertilize your garden yet, you could sprinkle some on your raised beds and work it in a little. Now you have a raised bed ready for an early crop of onions, carrots, radish or peas. Complete this process for several beds.
Start Cucumber Melon Squash Onion and Lettuce
At the end of March (or early April if you can’t get to it) you can plant trays of cucumbers, melons, squash, head lettuce and onions. Six to eight weeks before our last frost is about the right time to start them in Zone 5. Adjust the timing for your zone.
Onion sets can be planted outside in the raised bed you prepared. Dick recommends not to buy the largest onion sets for two reasons. One, they could split and form two lesser onion bulbs. Two, they will grow too fast and go to seed. If the energy goes into making the seed, it won’t go into making a bulb. You want the bulb, not the seed so buy the smaller sets.
Reminders
- Make sure to keep all of your trays of plants watered and warm. I check mine every morning and water when needed.
- Build some raised beds in the garden if your soil is dry enough.
- Plant some early onions, lettuce, carrots and peas in your raised beds.
- Plant flats of cucumber, melons, squash, lettuce and onion seeds.
- Plant any of the early seeds that you didn’t get to in February.

April
- Soil preparation
- Early raised bed garden
- Transplanting to larger containers
- Block planting peas
- Wide row planting hardy seeds in garden
- Plant bank outdoors
- Salad Row
Well that’s it for March. See you in April!
Veronica
Leave a Reply